A child care provider’s top priorities are the kids under her care, which is why they rarely choose activities that will take too much of their time and become a distraction. However, they still want to engage the kids in fun and distinctive crafts that stand out. For this reason, we’ve put together a quick easy-to-make St. Patrick’s Day pop-card that you’ll surely pin to your list of favorites for its simplicity and uniqueness.
Materials :
- Orange, green, and white construction paper
- Scissors
- Glue Stick
- Black Marker
- Pencil

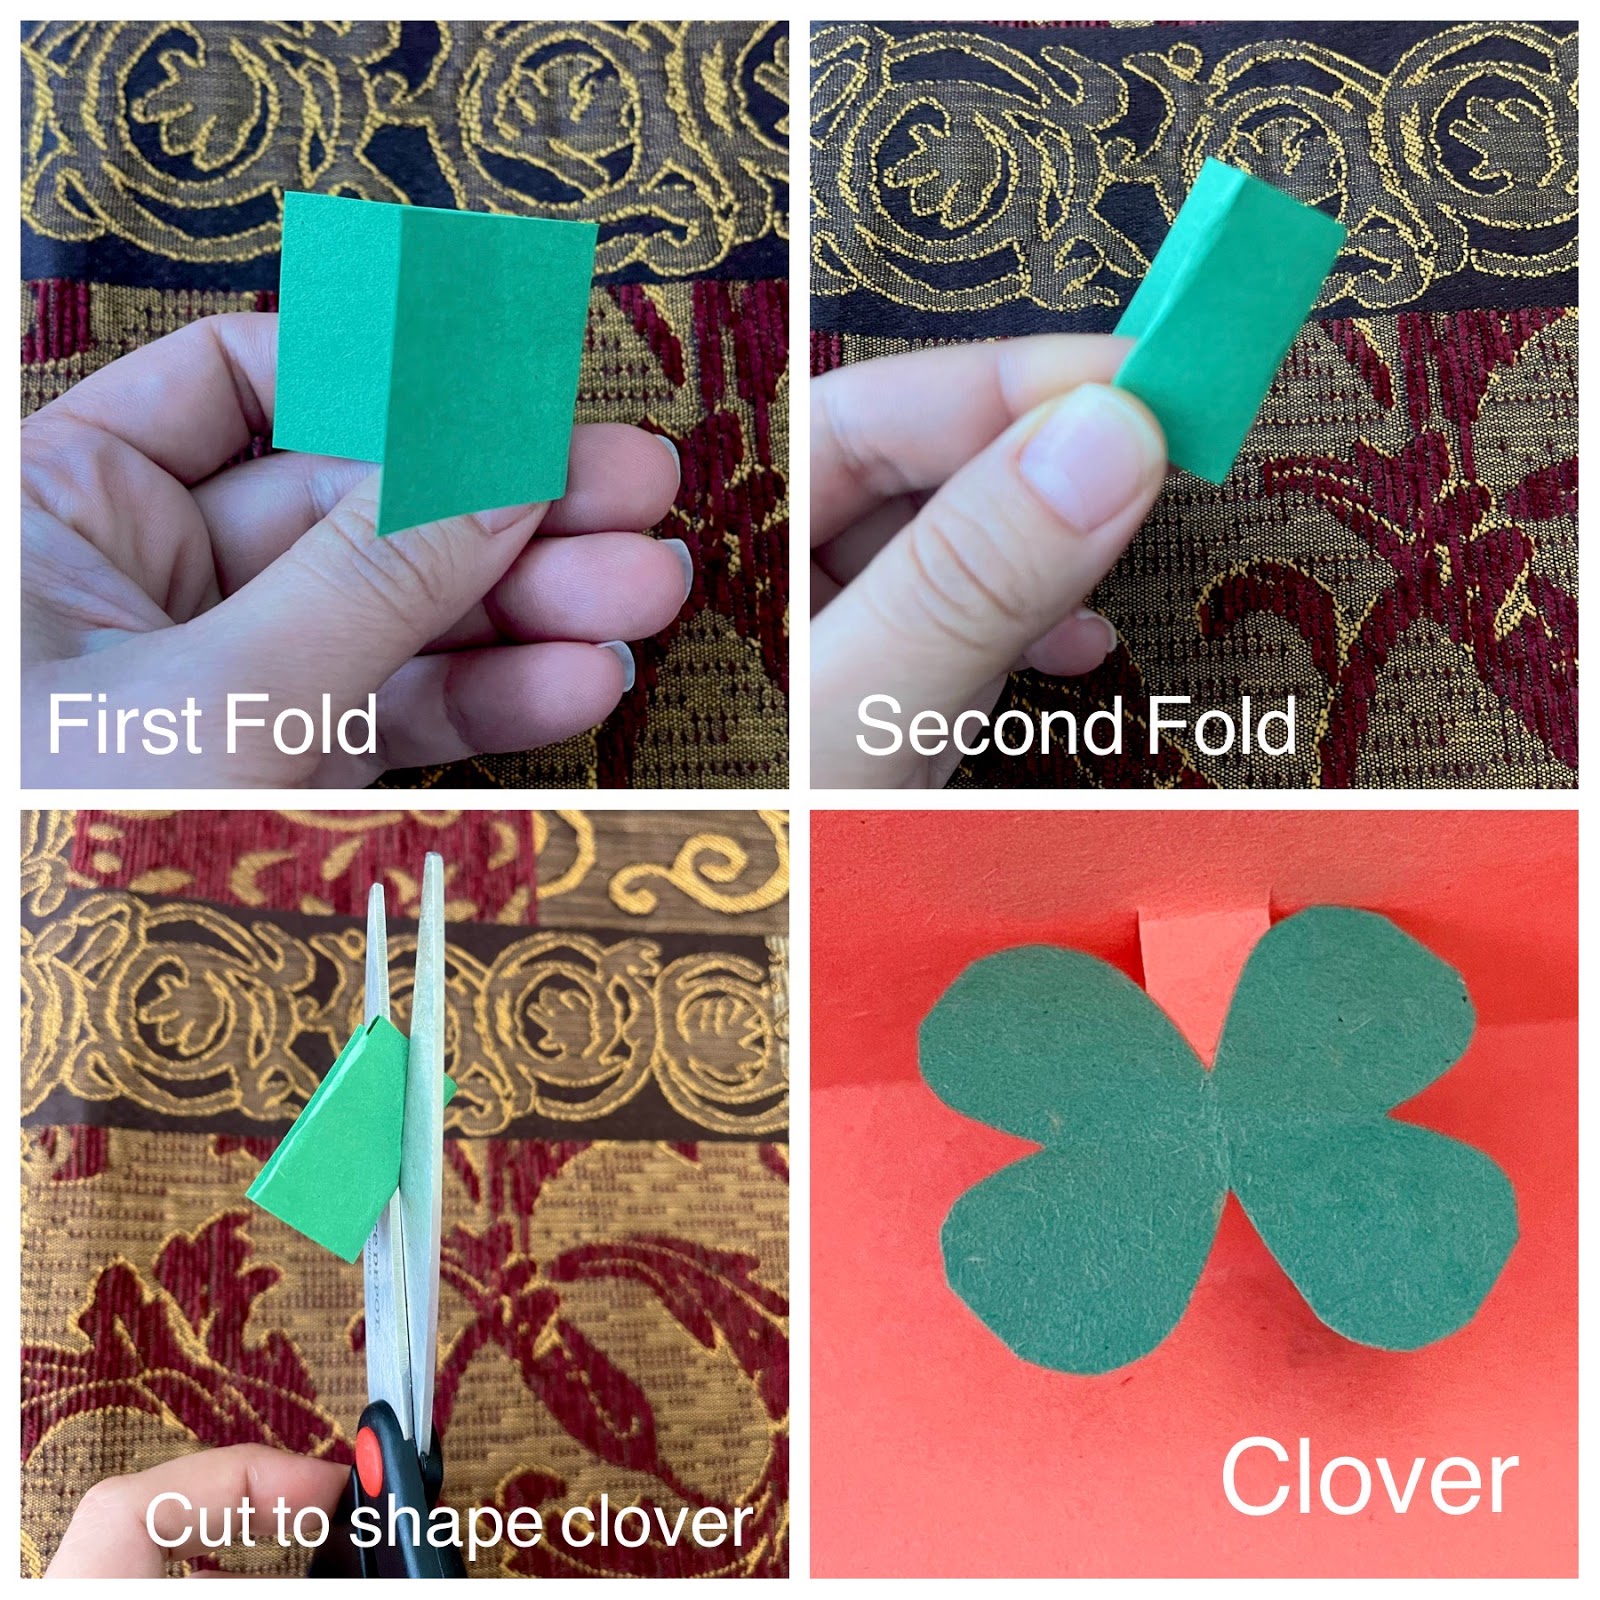
Making the Shamrock
Locate a two-inch piece of green construction paper and fold it twice. Next, cut around it like a heart but not completely, and trim until you shape a four-leaf clover or shamrock.